You have no items in your cart.
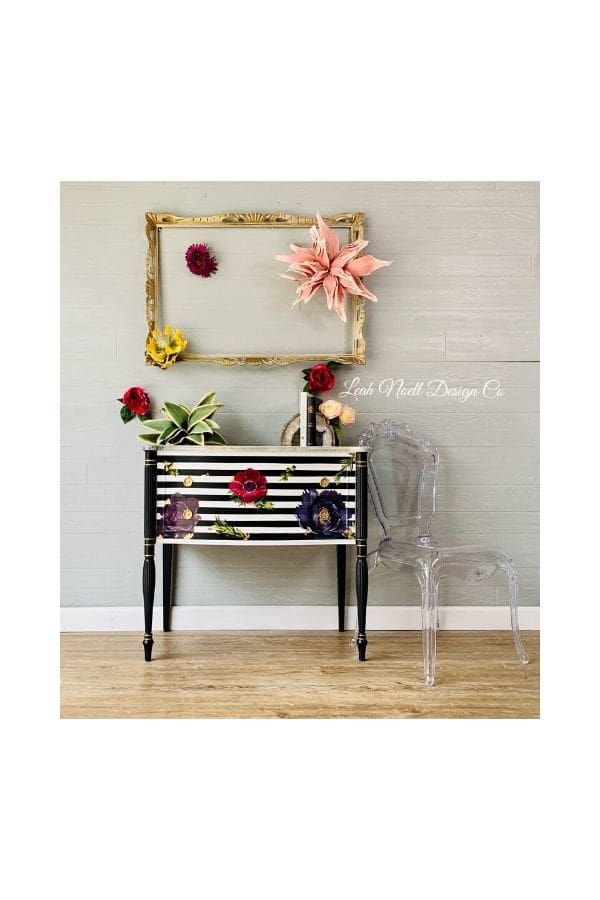
Resin Top? Black and white stripes? Over sized florals? Gold Leaf? Ummm…YES PLEASE! This little painted mini buffet is definitely my favorite piece I’ve ever painted! I’m excited to share the details with you. This is what it looked like before we started.

This post contains affiliate links. You don’t pay any more from ordering from these links but I earn a small commission so I can continue to bring you more fun projects! They also allow me to show you exactly what I use so you know what I’m referring to!
Material List:
- White Lightning Cleaner
- BOSS Primer in white
- Cotton Chalk Mineral Paint
- Caviar Chalk Mineral Paint
- Gold Digger Metallic
- Resin Epoxy
- Gold Leaf
- Frog Tape
- Gold Leaf Adhesive
- Over Sized Floral Transfer Coming Soon
- Gilding Wax Gold
- Clear Satin
- Gloss Clear Coat
- Big Mamma’s Butta
- Dixie Belle Mini Synthetic Brush
Ya’ll know how this starts…First you must throughly clean your piece. I mean you have to get all the dirt, grime, and years of furniture polish off it. It’s not as hard as it sounds. I like to clean my piece once over with White Lightning and rinse it well. If you’ve never prepped furniture before you can read more about it here.
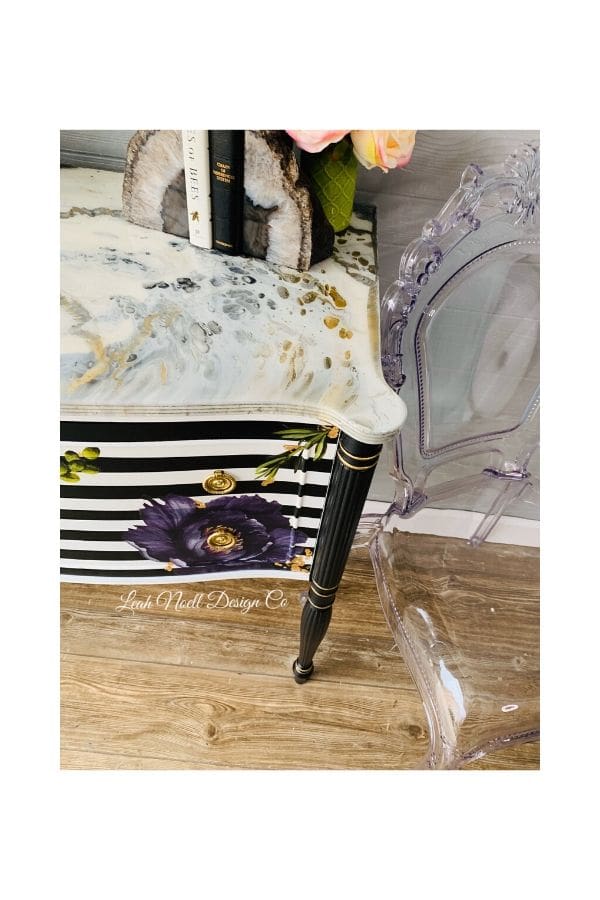
Now let’s get into the fun stuff!! I knew exactly how I wanted this piece to look. It took some planning, but I had a clear vision so it was easy to execute. To be honest with you guys…usually my vision isn’t so clear. I make a lot of design decisions as I go. First, I did a paint pour on the top of this piece. I used Caviar, Cotton, and Gold Digger. I let it dry overnight and then sealed it with resin 24 hours later. I am so into resin right now. I just love this stuff!! If you have never used it before, I created a video showing how to pour it on top of furniture here.
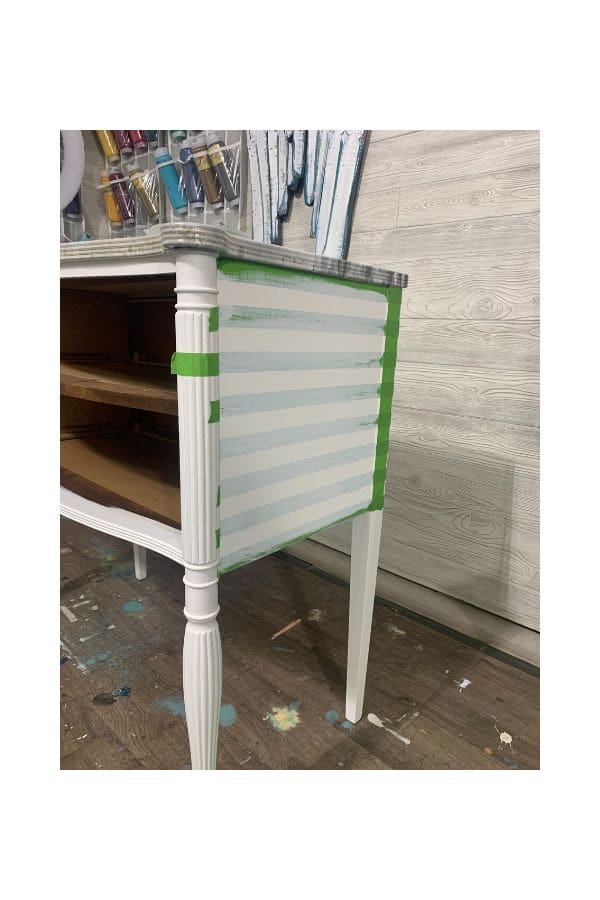
While the resin was curing, I primed my piece. Primer is an optional step, but if you’ve read any of my blogs you know it is a preference of mine. It prevents problems that can occur down the road such as bleed through (An oily substance that comes through your paint. It’s usually caused by tannins in your wood.). I gave this piece 3 coats of white BOSS primer. I did 3 because it is mahogany which is known to bleed a pink color through the paint. It’s good to use the white primer because you can see if any color is bleeding though as pictured here. If you are still getting this yellow/pink color coming through your primer after the second coat, then spray it a couple times with shellac. Then continue with a 3rd coat of primer. Usually 2 coats is fine, but like I said, mahogany has a reputation for bleeding!
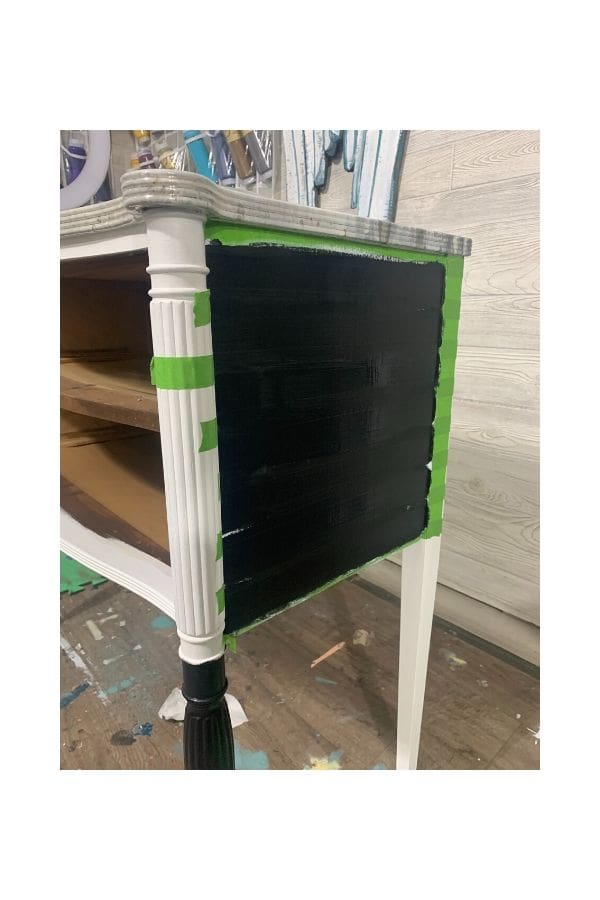
After primer, I gave this piece 2 coats of Cotton which is a stark white color. Then it was time to enlist my husband to measure out the stripes. You see, I’m really good at pouring paint, creating abstract artistic finishes, and putting designs together….But hand me a tape measure and some tape and I’m screwed! I needed these stripes to be precise to execute my design! He was the right man for the job!
After you have your stripes tapped off with Frog Tape (I use frog tape because it really is the best), you’re going to want to paint over it with your base color. So I gave the whole piece a coat of Cotton paint. Why paint with your base coat again? I do this because if the paint is going to bleed through the tape, it will do so on the first application. If you use the color you’ve tapped off for your first application, then you will have crisp clean lines! Once that dries you can move forward with your second color. I used Caviar which is Dixie Belle’s blackest black. I wanted the whitest white (Cotton) and the blackest black (Caviar)!!
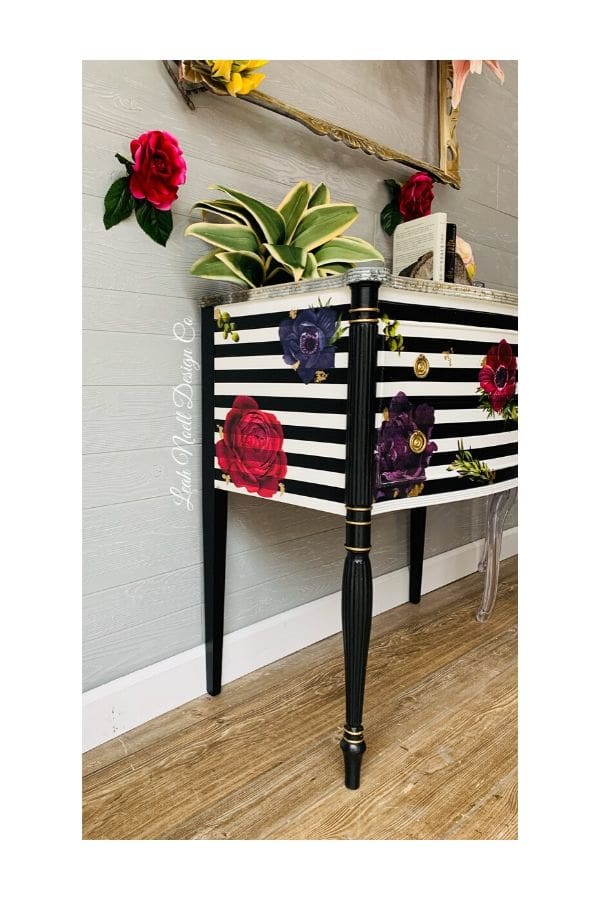
This is where it all started coming together! I have these oversized florals (if you can’t find them at this link, it means they are not on this site yet). I have an obsession with black and white stripes paired with florals. Did you see my metal desk makeover? This is similar but better! I cut each floral out and laid them out on the floor. Then I went to bed. Seriously this is how I work. After a good nights rest I was ready to work. Positioning these is the most challenging part. I like to lay them out with painters tape first. The design rules I follow are work in triangles and with odd numbers for placement. You can see that the florals are in a triangle shape and there are 3. Then I added the greenery. I added 4 pieces of the green leaves to equal 7 total pieces on the front. It makes it more appealing to the eye. I added touches of gold leaf to around the flowers to really add to the WOW factor of this design. I continued on the sides. One of the things I love about these transfers is that I never seem to use the whole sheet. I can usually get another small project out of them!

After the transfer is adhered, I press them down firmly into the paint. I take my time and make sure they are secure. Then I applied a coat of Satin Clear Coat. This topcoat seems to work the best with transfers. After I gave it one coat I applied 2 coats of Gloss Clear Coat. It’s rare I pull out the high gloss finish, but this design called for it! Lastly I applied gold gilding wax on just the details of the legs. To finish this piece I applied wax to the drawer sides. I use wax because it works better with the sliding drawers. I applied Big Mamma’s Butta to the insides of the drawers to make them nice a fresh. Painting the drawer sides and cleaning the inside of your piece is a MUST. Especially if you are turning furniture for profit. The inside matters! Don’t make me preach!!
Here is the final photo! You guys…this is my most favorite piece EVER! When my friends came over the week of creating this and said….””You should keep it white with the resin top, I think it will sell better.” I replied, “I don’t care if it sells. I have a design on my mind and it MUST come out 😂!” This piece is available for sale. I may cry if you purchase it, but I just hope it goes to a good home where it is loved! You can purchase it here. Update: SOLD