You have no items in your cart.
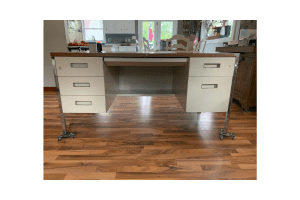
I love these big metal tanker or teacher desks! But why are they made so ugly? I wondered for years if I could actually paint mine, and the answer is a big YES! You can totally paint them!
This post contains affiliate links. You don’t pay any more from ordering from these links but I earn a small commission so I can continue to bring you more fun projects! They also allow me to show you exactly what I use so you know what I’m referring to!
Material List:
- White Lightning Cleaner
- Slick Stick Primer
- Foam Paint Roller
- Frog Tape
- Goo Gone
- Bondo
- Cotton Paint
- Caviar Paint
- Plum Crazy Paint
- Colonel Mustard Paint
- Clear Satin Top Coat
- Wondrous Floral Transfer
- Gold Leaf
- Putty knife
- Sand Paper
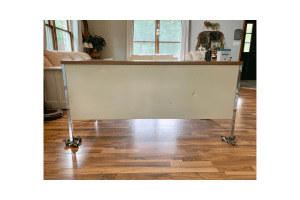
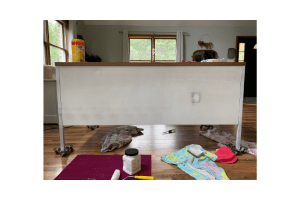
I’ve had this tanker desk for years. It lives in my upstairs office. It is super big, and extremely heavy. We recently had new carpet put in upstairs, so it had to come down while we were working up there. This gave me the perfect opportunity to paint it! It was too big to actually move into my garage, so I painted it right in my living room.
The first and most important step is to prep your metal for paint! I started by putting Goo Gone on all the tape residue. A desk like this always has tape residue on it. Then I scraped the goo gone off with a razor knife. After that, I sanded all the rust off with a sanding pad.
Then, I cleaned the entire piece with white lightening cleaner. I made sure to REALLY clean off the Goo Gone residue. It’s a little oily so it took a little more elbow grease than ususal. After that, I applied Bondo to the dents that metal desks like this seem to pick up over time. You can view the video I did for prepping this piece here: https://www.facebook.com/leahnoelldesignco/videos/1194553357398574/
Once the Bondo was dry, I sanded it back. You want to build your Bondo up high and sand it back. I did bring my palm sander inside to do this. It just makes life easier!
Once your Bondo is dry and level with your surface, it’s time to apply the key product to your desk, Slick Stick Primer!! This stuff is amazing! It’s made to help paint stick to surfaces such as metal, tile, glass, and laminate. I like to use a foam roller to apply it. Big flat surfaces like these are just easier to paint with a roller. I only applied one coat of Slick Stick.
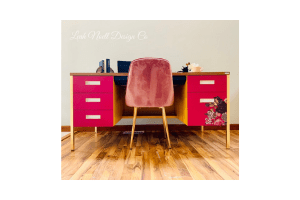
Once it is primed, you can paint your piece in anyway you choose! If you wanted to keep the metal chrome legs the same color, you can just tape them off. For this piece, I decided to paint them and apply gold leaf to them.
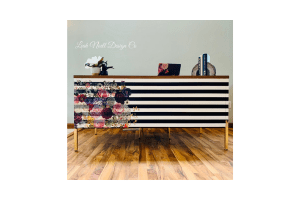
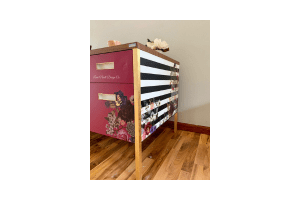
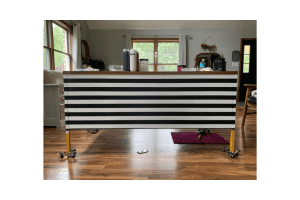
I had a lot of ideas going through my head, but I decided to paint this using black and white stripes because they are something I will never tire of! They are so classic. I used Dixie Belle paint in Cotton and Caviar for this. First, I applied 2 coats of Cotton. Then I measured out the stripes and applied Frog Tape. I like to use the tape as a guide for the measurements. I always ask my husband to do this part because he is much more precise than me with measuring stripes! After the stripes are all laid down, I paint another coat of Cotton over the tape. The reason I do this, is because if any paint is going to bleed through the tape, it is going to happen on the first application. This “seals” it in and creates cleaner stripes.
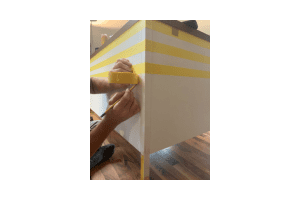
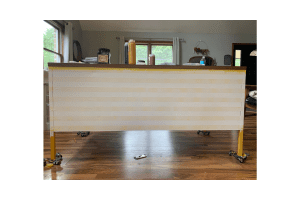
After the Cotton paint was dry, I applied 3 coats of Caviar to make the black stripes! After the last coat was applied, I pulled the tape off while it was still wet. The lines were perfect!!
To finish this piece I painted the front drawers with Plum Crazy, which is a hot pink color. The inside of the desk was painted in Colonel Mustard and the front drawer is done in Caviar! To accent this piece and really make it unique, I added the new Wondrous Floral Transfer ! (If you can’t find it at this link please contact me at leah@leahnoelldesignco.com and I will help you find it!) I made sure it was secure by rubbing it down in every spot with my fingers. After It was applied, I added Gold leaf to a couple areas to accent it! I also added Gold leaf to all the spaces that were chrome before. To seal it, I applied 2 coats of clear satin. I’ve found that the clear satin works well with the transfers. And for the top…I just left it how it was! It didn’t need anything. I just love how this piece turned out!