You have no items in your cart.
Is Steam Punk your style?
This post contains affiliate links. You don’t pay any more from ordering from these links but I earn a small commission so I can continue to bring you more fun projects! They also allow me to show you exactly what I use so you know what I’m referring to!
Material List:
- Caviar
- Manatee Gray
- BOSS Primer in Clear
- WoodUbend Gear Collection 56
- WoodUbend Gear Collection 515
- WoodUbend Applique Center 1320
- Steam Punk Transfer
- Silver Gilding Wax
- TiteBond Quick & Thick
- Patina Paint
- Patina Spray
- Clear Satin Top Coat
- Gator Hide
- Synthetic Mini Brush
This piece was rough. My friends Jessica and Rich had found it for a great price! But it needed some work. So Rich actually re-glued all the veneer, added wood filler and fixed most of the damage before he brought it to me. Which made my job much more enjoyable!
Now if you’ve been here for a hot minute you know I’m going to say it’s important to start out with a good prep job. If you’ve never prepped furniture before, you can learn how I do it here.
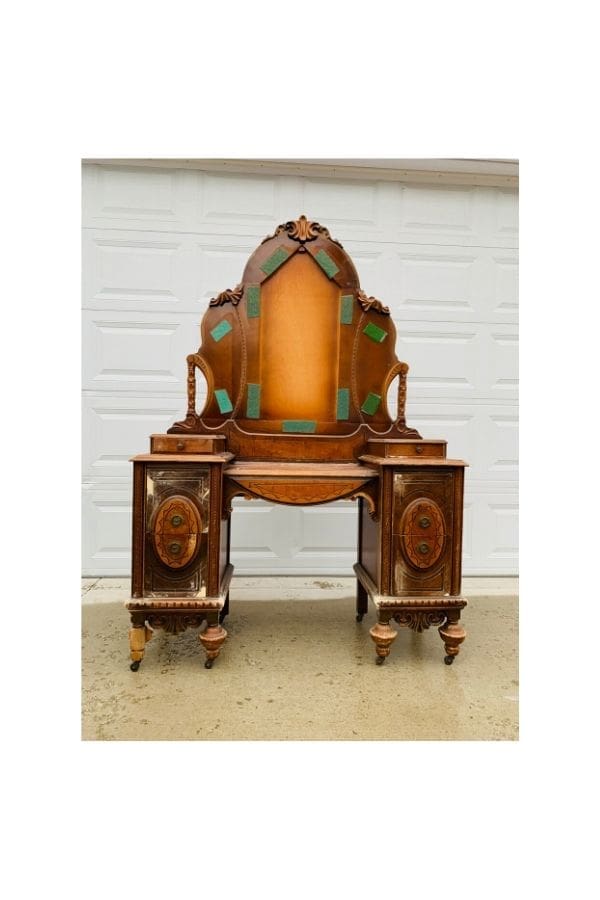
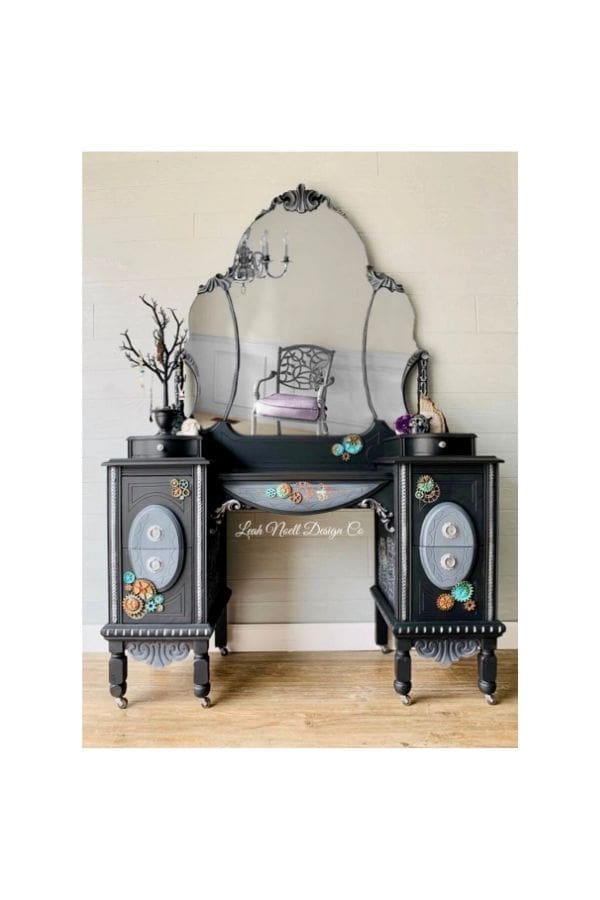
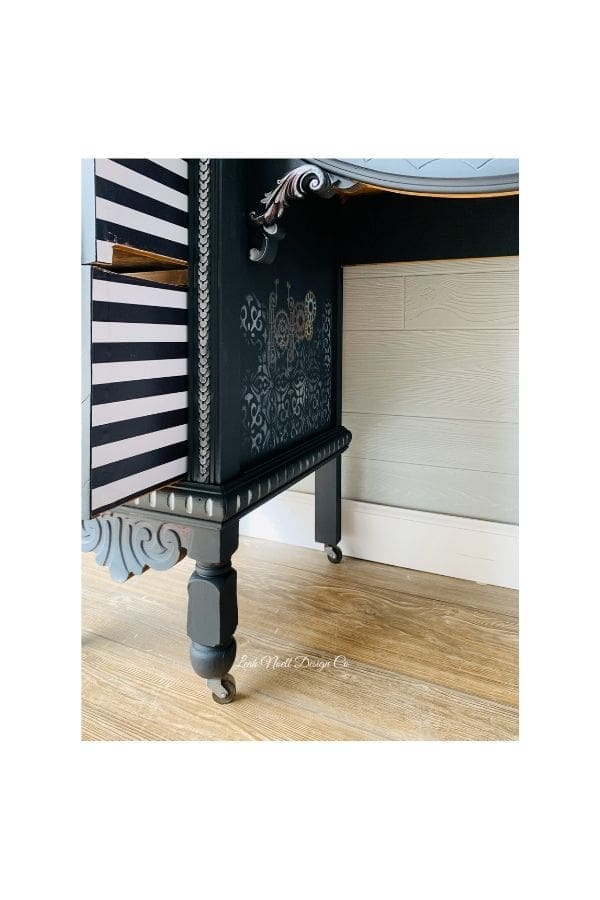
Do you see those round details on the feet? I get asked all the time how to fix the one that is missing one on the left. Instead of fixing it, I use a hammer and chisel to knock off the the other round parts on the legs. Then I sand them out.
For the design of this vanity, I wanted to really capture the personality of the owner, Jessica. I literally have her name saved in my phone with a skull and cross bones. She’s super sweet, but her style leans toward gothic skulls, steam punk, and I added Beetlejuice in my head. (To be honest, I don’t even know much about Beetlejuice it just kind of felt right.)
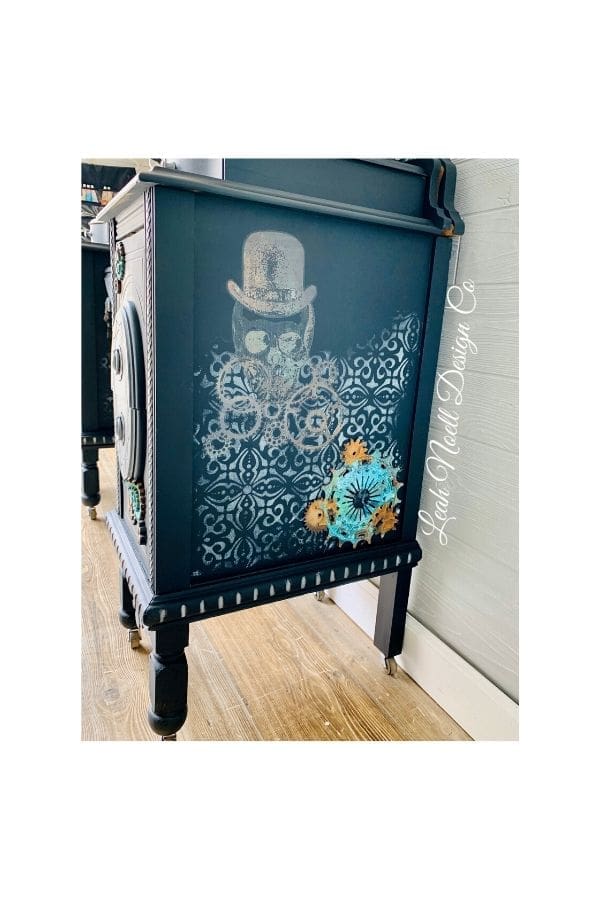
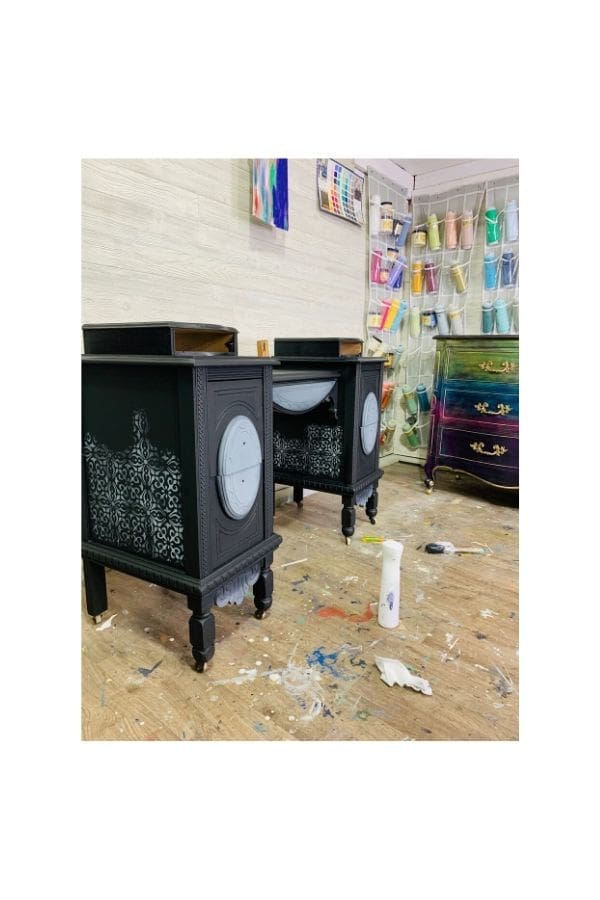
The body of this piece is painted in Caviar which is the richest black from Dixie Belle Paint. The centers are blended with Manatee Gray. Once it was dry, I used a stencil called French Trellis to accent all the sides. Then I made it look aged and faded.
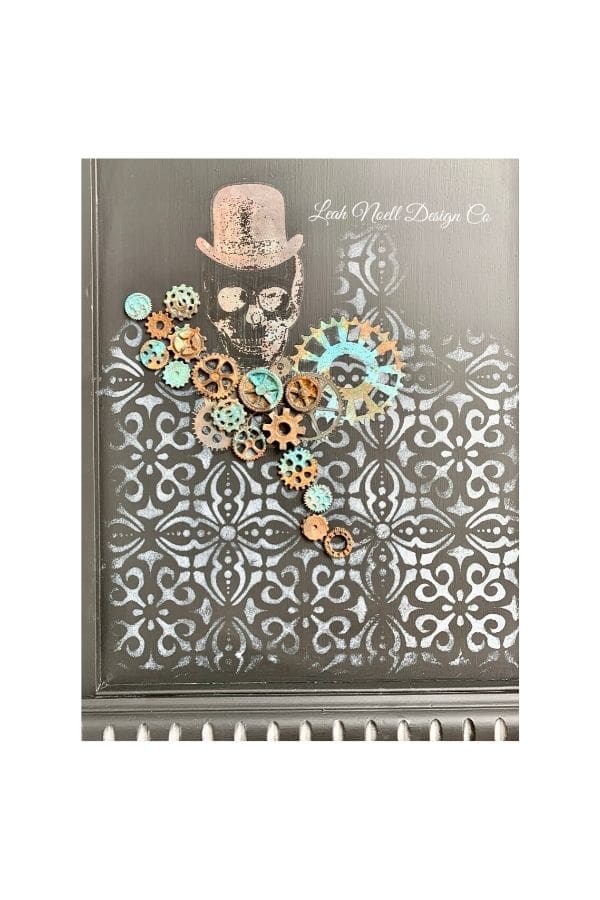
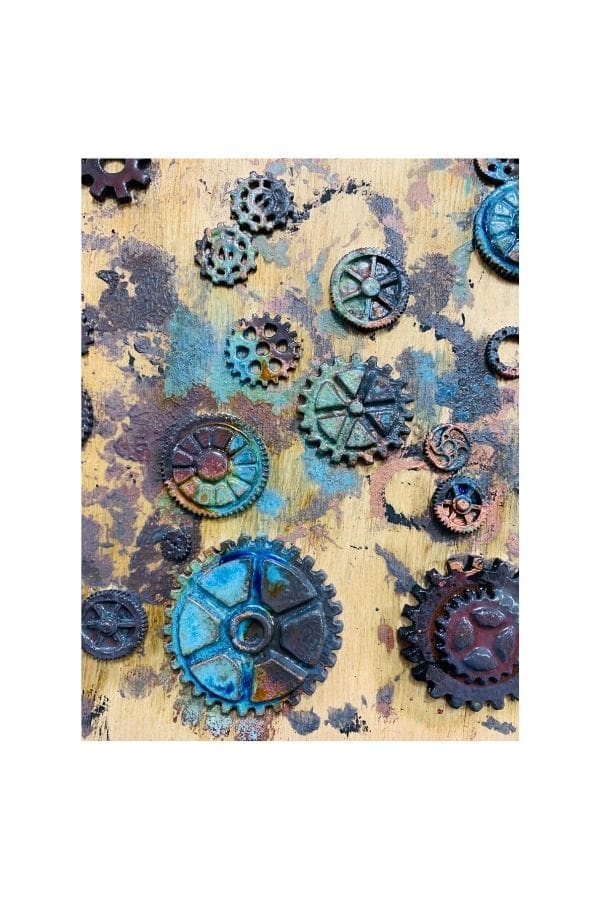
Then it was time to add the accents! I used the Steam Punk Transfer from Redesign. I used this transfer underneath the WoodUBend gears. I painted them with iron and copper patina paint! They turned out SO cool! The patina is easy to use. First you paint it with your choice of iron, copper or bronze and let it dry. Then you paint one more coat of the paint on and while it is still wet, you spray it with either the blue or green spray depending on the color you want. The green spray will give more of a rusted look on your iron paint. Here is a progress photo a few minutes after the pieces were sprayed.
Once these were dry, I laid them out on my piece and it was time to attach them. One of the coolest things about WoodUBend is that you can heat them up and apply them over curved surfaces. I used Titebond Quick and Thick to attach these.
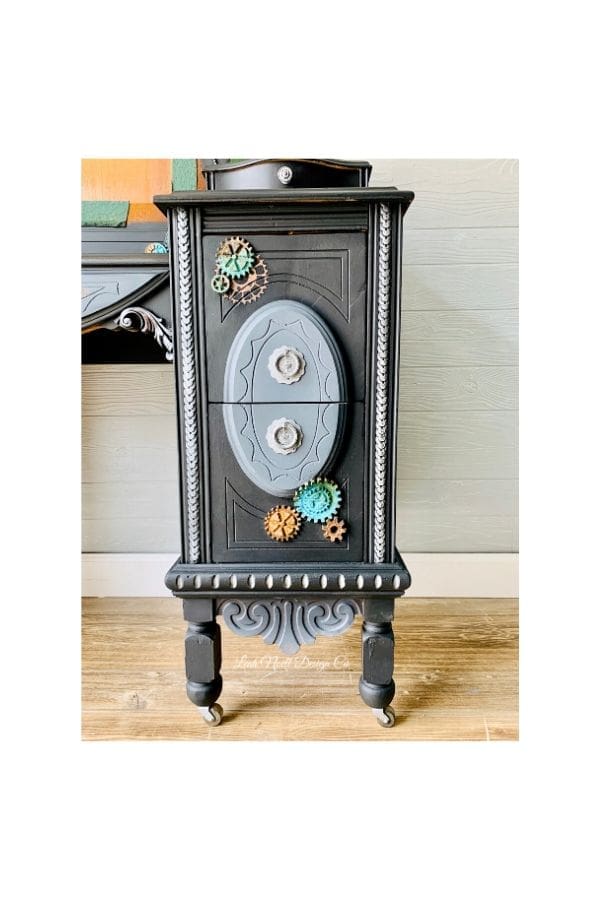
I sealed this piece with Satin Clear coat and then for the details I used Silver decor wax. I added a coat of Gator Hide to just the top. This ensures a lasting durable finish on the part that will get used the most. If you want my tips on how to get a buttery smooth top you can read my blog here.
Last but not least I added this striped “Beetlejuice” paper to the drawer sides. I cleaned the drawers out and used Big Mama’s Butta on the inside to restore the wood! Okay you guys, this is totally not my style but I absolutely LOVE how it turned out!!