You have no items in your cart.
So you’ve decided to paint some furniture. Now what? You’ve heard of this thing called chalk paint, but there are a million brands to choose from. Do you have to clean my piece? Do you have to prime? Why is everyone showing you all these crazy techniques when you don’t even know where to start!
First, take a deep breath. I know this can be overwhelming so I’m dedicating this post to beginners. We were all beginners at one point or another. I’m going to tell you about the 6 products that I recommend if you want a professional finish.
This post contains affiliate links. You don’t pay any more from ordering from these links but I earn a small commission so I can continue to bring you more fun projects! They also allow me to show you exactly what I use so you know what I’m referring to!
Material List:
I’ve been chalk painting for a hot minute and I’ve found that I love to use Dixie Belle Products. It’s a no brainer for me because they carry paint, as well as an extensive product line of tools and finishes to use alongside their paints. So it’s an easy one stop shop!
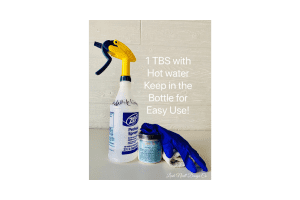
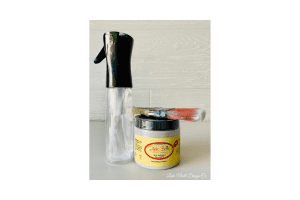
The first thing you need to do is clean your furniture really well. Even if your furniture looks clean, it has oils on it that paint won’t stick to. I like to mix White Lightning Cleaner in a spray water bottle. I use a heaping tablespoon of the cleaner with hot water and shake it up. I keep it premixed in my shop so I don’t have to mix it every time I clean furniture. Next, I spray the cleaner/water mixture on my piece and wipe it down with a wet rag. I will use a toothbrush to clean small, detailed areas. Then, I rinse the White Lightening off the piece with clean water. I usually fill a bucket with water so I can rinse my rag. Finally, I let my piece dry completely.
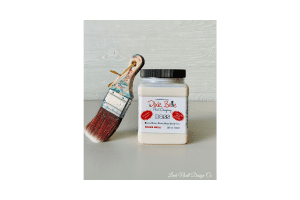
If you’re going to be painting furniture, I recommend investing in a good brush. A good brush costs a little more, but it helps alleviate brush marks on your finished product. It will also last a long time after your initial project if you wash it out with hot water and soap between uses. If you’ve used cheap bushes you’ll definitely see a difference right away! My favorite brush is the Mini because it is a nice size and I love its short handle because the short handle helps your hand from getting tired which makes it easier to use.
Now, the next step is optional– you don’t have to prime your furniture if you are using chalk paint. The whole point of chalk paint is it doesn’t need primer to stick to wood, glass, metal, and plastic. BUT, my personal preference is to prime when I paint wood furniture. Wood does something in the furniture world we call bleed through. Bleed through happens when oils in the wood seep through the paint. Thats why I like to use BOSS primer; It literally stands for Blocks Odor, Stains, and Stops Bleed thru. It comes in clear and white. If you’re painting something a dark color, or if you’re distressing it, use clear, but if you’re painting something a light color, use white. This step may take a little more time but it will save you so much frustration. I usually apply 1 to 2 coats depending on the age and condition of my piece. If it is knotty pine I use 2 coats because pine is known to seep oil. If it is very old or has been in a smokers house (think about antiques and furniture from the 30s-70s, everyone smoked back then!), I use 2 coats. I apply it with my mini brush!
Once the primer is dry, it’s time to chalk paint! I like to start with a damp brush. I also sometimes use a spray bottle with water to help apply the paint. You’ll notice that the BOSS primer helps the chalk paint cover the wood thoroughly. Dixie Belle Paint is self-leveling so it’s super easy to use; it only takes me about 2 coats to cover my piece. The first coat will go on easy. The second coat will take more paint because chalk paint is porous. I recommend ordering the 16 ounce paint container. Generally, it is enough to cover a regular-sized dresser or buffet.
Once your paint is dry, it is time to seal! You can tell your paint is dry because it will be room temperature when you touch it. If it feels cool to the touch, it still isn’t dry. I always wait at least 2 hours after the final coat to seal my piece. Now, there are SO many options for sealing, but I’m going to only recommend one today to keep it simple. I use the Clear Satin Topcoat with the blue sponge. I’ve found that this is the easiest sealer to use, and it cleans nicely. I like the satin because it can almost look matte but has some durability to it! When using topcoats remember this: the higher the gloss–the more durable the finish. The satin finish just has a perfect sheen and durability for my projects. Now for the top, I do recommend sealing it with Gator Hide after the clear satin is applied; especially if the piece is going to be in a high traffic area like a kitchen or dining room. But if your piece is just a dresser or something that isn’t going to have a glass of water or wine tip over on it, you’ll be fine with just the Clear Satin Topcoat. You can read more about how to seal high traffic areas here.

I hope this was helpful if you are just beginning! These are the basic steps and products that I recommend. Once you have these down you can start experimenting with glazes, waxes, patinas, and other fun stuff!